A newer version of this tutorial for Ubuntu 22.04 is available here: How To Install Calibre Server & Calibre Web On Ubuntu 22.04
Calibre is a free, open source and easy to use e-book manager. Calibre supports organizing existing e-books into virtual libraries, displaying, editing, creating and converting e-books, as well as syncing e-books with a variety of e-readers. Editing books is supported for EPUB and AZW3 formats.
1. Install Python and dependencies
$ sudo apt update
$ sudo apt upgrade
$ sudo apt install python python3
$ sudo apt install xvfb
$ sudo apt update
$ sudo apt install imagemagick2. Download and install Calibre-server
$ sudo -v && wget -nv -O- https://download.calibre-ebook.com/linux-installer.sh | sudo sh /dev/stdinYou may notice some warnings about failed desktop integration, but these are safe to ignore, since you are installing Calibre on a remote server.
3. Create a new Calibre user
Create a new user for Calibre and give it superuser privileges:
$ sudo adduser calibre
$ sudo usermod -aG sudo calibre
4. Create Calibre library directories
Log out and log back in with the new user you just added. Then make a directory for the Calibre library and uploads.
$ sudo mkdir calibre-library
$ sudo mkdir calibre-upload
Change ownership permissions of the directories:
$ sudo chown -R calibre:calibre calibre-library
$ sudo chown -R calibre:calibre calibre-upload
$ sudo chown -R calibre:calibre .config
$ sudo chmod ugo+rw calibre-upload
$ cd ~
5. Add a sample e-book
Download a sample e-book to load into the upload directory:
$ cd calibre-upload
$ sudo wget http://www.gutenberg.org/ebooks/219.epub.noimages -O heart.epub
Then add the e-book to the library:
$ sudo xvfb-run calibredb add ~/calibre-upload/* --library-path ~/calibre-library6. Test the server
To test the server, launch with the following command (you can substitute the port 8081 with something else):
$ sudo calibre-server --port=8081 --enable-local-write ~/calibre-libraryThen open your web browser and go to:
http://yourwebsite.com:8081 or if using a local LAN, http://192.168.0.XX:8081 (replace ‘XX' with the coorect IP Address)
When you are satisfied everything works, go back to the command line and Ctrl+C to exit.
7. Add a log file
Add a log file and change its ownership permissions:
$ sudo touch ~/calibre.log
$ sudo chown -R calibre:calibre ~/calibre.log
8. Add / Manage Calibre Users
$ sudo calibre-server --userdb /home/calibre/.config/calibre/server-users.sqlite --manage-usersThen follow the prompts. Repeat to add, edit or remove users.
9. Starting Calibre server at boot
$ sudo nano /etc/systemd/system/calibre-server.serviceAdd the code below changing User, Group, port and the location to the calibre-library directory (in this case /home/calibre/calibre-library):
[Unit]
Description=calibre content server
After=network.target

[Service]
Type=simple
User=calibre
Group=calibre

ExecStart=/usr/bin/calibre-server\
--max-opds-items=30\
--max-opds-ungrouped-items=100\
--port 8081 \
--log="/home/calibre/calibre.log"\
--enable-auth \
--userdb="/home/calibre/.config/calibre/server-users.sqlite"\
"/home/calibre/calibre-library"

[Install]
WantedBy=multi-user.target
Ctrl+X to Save and Exit.
Then start the server with:
$ sudo systemctl start calibre-server.serviceCheck the status with:
$ sudo systemctl status calibre-server.serviceThen to start at boot:
$ sudo systemctl enable calibre-server.serviceMore
If you have make any changes to calibre-server.service, reload:
$ sudo systemctl daemon-reloadTo stop calibre-server:
$ sudo systemctl stop calibre-server.serviceYou can uninstall Calibre by running:
$ sudo calibre-uninstall10. Install Calibre-Web (Optional but recommended)
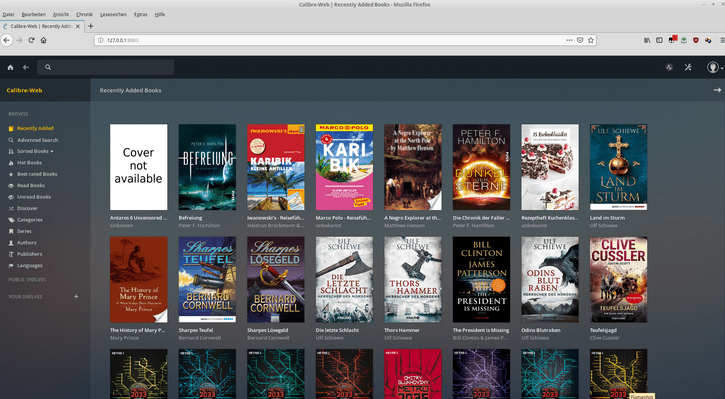
Calibre-Web is a web app providing a clean interface for browsing, reading and downloading eBooks using an existing Calibre database.
Make sure you are logged in as the user calibre. Make sure that we have a python version greather than python2.7 installed. Check your python version:
$ python --versionIf it outputs Python 2.7.x.x then we need to change the default to python3. To do this:
Update pip if necessary like this:
$ sudo -H pip install --upgrade pipOpen your .bashrc file:
$ sudo nano ~/.bashrcType alias python=python3 on to a new line at the top of the file then save the file with ctrl+o and close the file with ctrl+x.
Then, back at your command line type:
$ source ~/.bashrcNow your alias should be permanent. To verify the change:
$ python --version11. Download the lastest Calibre-Web:
Download, unzip and rename the calibre-web directory:
$ cd ~
$ wget https://github.com/janeczku/calibre-web/archive/master.zip
$ unzip master.zip
$ sudo mv calibre-web-master calibre-web
$ cd calibre-web
12. Install Calibre-Web:
$ sudo pip3 install --target vendor -r requirements.txtWhile still in the calibre-web directory, using python3+ run (for python2.7 run python cps.py):
$ python3 cps.pyor preferrably, if you want to exit the terminal window (which you will want to do) (for python2.7 run nohup python cps.py):
$ nohup python3 cps.pyFOR ANY ERRORS WHEN RUNNING THESE COMMANDS, SEE:
https://github.com/janeczku/calibre-web/issues/1290
https://github.com/janeczku/calibre-web/issues/1233
In your browser, go to http://yourwebsite.com:8083 or http://localhost:8083 (or http://yourwebsite.com:8083/opds or http://localhost:8083/opds for the OPDS catalog). You can change the port number later in the GUI if you want. NOTE: Do not change the port number to 80 if you want to access Calibre-Web without the port number – Instead, setup a reverse proxy – See comments below.
13. Set the location of the Calibre database
This is where the metadata.db is. In this case, /home/calibre/calibre-library. Click submit. The default admin login is:
Username: admin
Password: admin123
14. Enable on-the-fly conversion (Optional)
Optionally, to enable on-the-fly conversion from one ebook format to another when using the send-to-kindle feature, or during editing of ebooks metadata:
Download Amazon's KindleGen tool for your platform and place the binary named kindlegen in the vendor folder:
http://www.amazon.com/gp/feature.html?docId=1000765211
$ sudo mkdir /home/calibre/kindleUpload the .tar.gz (v2.9 as of this writing) file to the new kindle directory you just created. Then untar the file and move it to the vendor directory inside calibre-web:
$ cd kindle
$ sudo tar vxfz kindlegen_linux_2.6_i386_v2_9.tar.gz
$ sudo mv kindlegen /home/calibre/calibre-web/vendor/
The tar.gz file includes KindleGen Legal Notices and documentation. If you would like to delete the folder:
$ cd ~
$ sudo rm -R /home/calibre/kindle
15. Start Calibre-Web on boot
Start Calibre-Web as service under Linux with systemd:
https://github.com/janeczku/calibre-web/wiki/Setup-Service-on-Linux
$ sudo nano /etc/systemd/system/cps.serviceAdd this and replace the elements in {} like User, ExecStart and WorkingDirectorywith your username, file and foldernames:
[Unit]
Description=Calibre-Web

[Service]
Type=simple
User=calibre
ExecStart={path to python} {/PATH/TO/cps.py including cps.py}
WorkingDirectory={/PATH/OF/CPS.PY without cps.py}

[Install]
WantedBy=multi-user.target
Example:
[Unit]
Description=Calibre-Web

[Service]
Type=simple
User=calibre
ExecStart=/usr/bin/python3 /home/calibre/calibre-web/cps.py
WorkingDirectory=/home/calibre/calibre-web

[Install]
WantedBy=multi-user.target
Enable the service:
$ sudo systemctl enable cps.serviceMORE
1. You can add the path to your SSL certifile (for https) in Calibre Web at Admin settings > Basic Configuration > Server Configuration.
2. To extract cover pictures from PDF files
If you see an error message in Calibre-Web logs like:
WARNING - PDF extraction forbidden by ImageMagick policy: not authorized '/tmp/calibre_web/xxxxxxxxxxxxxxxxxx' @ error/constitute.c/ReadImage/412 during upload of PDF files.ImageMagick recently changed their security policy, they now deny per default PDF operations, so covers can't be extracted anymore, you have to allow it in the policy.xml file. Do this:
$ sudo nano /etc/ImageMagick-6/policy.xmlchange the line:
<policy domain="coder" rights="none" pattern="PDF" />to
<policy domain="coder" rights="read" pattern="PDF" />Ctrl+x and ‘Y' to save and exit. Finally, restart Calibre-Web. You can do this from the web GUI in Admin Settings > Restart (near the bottom of the screen).
More: https://github.com/janeczku/calibre-web/wiki/FAQ
REFERENCES
https://calibre-ebook.com/download_linux
https://manual.calibre-ebook.com/server.html
https://www.mobileread.com/forums/showthread.php?t=288408
https://github.com/janeczku/calibre-web
https://gist.github.com/plembo/337f323e53486cbdb03100692ae8c892
https://www.digitalocean.com/community/tutorials/how-to-create-a-calibre-ebook-server-on-ubuntu-14-04
For info on Calibre performance, see:
https://www.mobileread.com/forums/showthread.php?t=208618
Hosting
This web app has been tested on DigitalOcean. This app can also be installed using other hosts such as Amazon AWS, Google Cloud, Microsoft Azure, Vultr and others.
Minimal Server Requirements
This installation should use at least 1GB of RAM.
Installation & Maintenance
If you would like to get this app installed, maintained or need training, Contact Me to get current rates.
Good afternoon, Sir/Ma,
I have successfully installed the Calibre Web on my server and it is working fine. I sincerely appreciate your effort by making this information available.
Meanwhile, whenever i try uploading pdf documents, i get an error as stated below:
ERROR {cps.editbooks:902} Database error: (sqlite3.OperationalError) attempt to write a readonly database
[SQL: INSERT INTO authors (name, sort, link) VALUES (?, ?, ?)]
[parameters: (‘Unknown’, ‘Unknown’, ”)]
(Background on this error at: http://sqlalche.me/e/13/e3q8)
At the moment, i am still searching for the solution. Your kind assistance is needed.
Hoping to hewar from you soon.
Hello, based on the error message above (attempt to write a readonly database), I would try to make sure your permissions are set correctly on the calibre-library directory as well as the metadata.deb file. To chmod the calibre-library directory (assuming the directory is located at home/calibre/calibre-library):
To chmod metadata.deb:
Also, make sure the directory is owned by calibre:
Hello, when i execute this command on the terminal “sudo chmod ugo+rw /calibre-upload”, i get “chmod: cannot access ‘/calibre-upload’: No such file or directory”. Please, how do i resoive it and proceed from there. Thanks
1. Check to make sure you created the ‘calibre-upoad’ directory inside of the ‘/home/calibre’ directory.
2. Make sure you cd into the ‘home/calibre’ directory before you run the command.
Actually, Thanks George for pointing out an error in the post above. The command should be:
Note that ‘calibre-upload’ does not include the ‘/’ in front of the directory name.
Again, George has pointed out a problem with some code in Step 9. I changed the port number in the “calibre-server.service” file to the default Calibre port number “–port 8081” and changed the port number to this default in Step 6. You can always change this port later (I had initially set the port at 8180).
Thank you for the quality update on your website on the installation of Calibre on Linux.
I installed the package successfully and changed the port from 8083 to 80. I have not been able to access the Calibre web since then I keep getting an error message Error starting server: [Errno 13] Permission denied
If you change the port number to 80, you will not be able to access Calibre Web’s GUI anymore (I have updated Section 12 above). You can change the port number to any other port that is NOT being used by another service. Since you changed the port to 80, the only way I found to revert back to your previous port (8083) is to open the sql database and manually change the port number in the table data. To do this, you can use a free sqlite db browser like DB Browser for SQLite (DB4S) – https://sqlitebrowser.org/.
Steps:
1. Go to your db settings located at ‘/home/calibre/calibre-web/app.db’ and save this file to your pc.
2. Download & install DB Browser for SQLite here: https://sqlitebrowser.org/dl/
3. Open app.db in DB Browser for SQLite, select the ‘Browse Data’ tab and change the port number in the ‘config_port’ column back to 8083 (or any other port that’s not being used)
4. Click the ‘Write Changes’ button.
5. Upload (& overwrite) ‘app.db’ to the server at ‘/home/calibre/calibre-web/’
You should now be able to access calibre-web again.
If you would like to access calibre-web without the port number, you will have to setup a reverse proxy. You can find settings for Nginx and Apache here: https://manual.calibre-ebook.com/server.html under “Using a full virtual host” or “Using a URL prefix”.
There was a issue raised on Whatsapp that the code to start Calibre Web on boot did not work. To solve this issue, open the file ‘cps.service’:
and change the line:
to
Note that the only change is that ‘python’ is changed to ‘python3’. Also, after modifying the file run:
The above post has been updated.
Very awesome and complete how-to. Although I’ve been using calibre-server for a couple of years now and loving it, I’m loving it even more now having discovered Calibre-Web thru your tut. Great job!