Local Development Environment Setup, Part 1
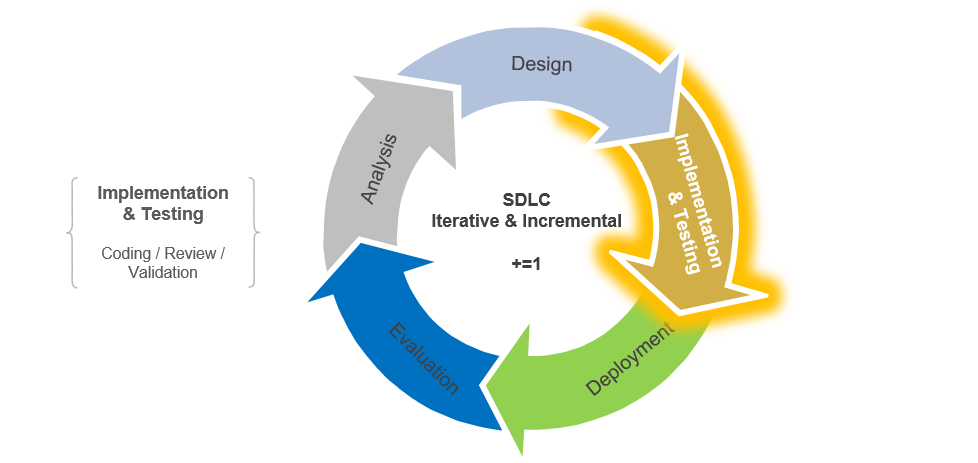
The Implementation & Testing Stage is where all the coding happens. It is also important to note that if we really wanted to simplify development, we could just go with a setup like XAMPP for our local development environment and for production, a shared hosting provider like imarkethost.com (disclosure: I own a stake in this company) for one-click WordPress installations. Although the method we choose to use now may be unnecessary for a blogging type of site, this method will provide an introduction to programming steps that will be used as a basis for future web application development that requires root level access to your server that shared hosting can’t provide.
1. Download the necessary tools (all are FREE & open source)
1.1 Download and install VirtualBox here https://www.virtualbox.org/ VirtualBox allows you to run multiple operating systems (inside multiple virtual machines) at the same time.
1.2 Download and install Vagrant for your operating system here https://www.vagrantup.com/downloads.html Vagrant is the command line utility for managing the lifecycle of virtual machines. For more information about Vagrant, click here https://www.vagrantup.com/docs/why-vagrant/
The installer will automatically add vagrant to your system path so that it is available in terminals. https://www.vagrantup.com/docs/installation/
1.3 Install Git Bash (Git) here https://git-scm.com/ Git is a version control system that is used for software development and other version control tasks.
1.4 (Optional, but recommended for use later) Download Putty here http://www.chiark.greenend.org.uk/~sgtatham/putty/download.html PuTTY is an SSH and telnet client. You can ssh into vagrant using 127.0.0.1 as the Host Name/IP address, and 2222 as the Port.
1.5 (Optional, but recommended for use later) Download WinSCP (You may find this tool to be very useful later) https://winscp.net/eng/index.php WinSCP is an open source free SFTP client, FTP client, WebDAV client and SCP client for Windows. Its main function is file transfer between a local and a remote computer. Beyond this, WinSCP offers scripting and basic file manager functionality.
Once you have these installed, we will be using Git Bash (Git) as our command line interface (CLI).
2. Setup the project with Vagrant
We will be using Ubuntu 14.04 as our local operating system (OS) because at the time of this tutorial there seems to be too many issues setting up Ubuntu 16.04 with Vagrant. Regardless, our local Ubuntu 14.04 environment creates no issues with the Ubuntu 16.04 OS that we will use for our production environment.
2.1 Start Git Bash.
2.2 Using Git, replace project with any name you wish:
$ mkdir project
$ cd project
$ vagrant init ubuntu/trusty64
2.3 In text editor – ‘Vagrantfile' located within the ‘project' folder, uncomment (by deleting the ‘#') and change config.vm.network “forwarded_port”, guest: 80, host: 8080 to:
config.vm.network "forwarded_port", guest: 80, host: 80
This will allow you to later access your local server at http://127.0.0.1
Or you can use the below settings which means that you will access your local server at http://127.0.0.1:8080
Change config.vm.network "forwarded_port", guest: 80, host: 8080
2.4 By using synced folders, Vagrant will automatically sync your files to and from the guest machine. Uncomment and change the line in ‘Vagrantfile' from:
# config.vm.synced_folder "../data", "/vagrant_data"
to
config.vm.synced_folder "sites", "/var/www/html"
where “sites” can be any name of a folder that you can now create inside your ‘project' folder. Now whatever folders/files you place inside “sites” will be processed by the Ubuntu/Vagrant local server.
2.5 From the Git command line, we start Vagrant:
$ vagrant up
2.6 Then, SSH into Ubuntu:
$ vagrant ssh
$ sudo apt-get update
$ sudo atp-get upgrade
If you are using Putty you can ssh into vagrant using 127.0.0.1 as the Host Name/IP address, and 2222 as the Port. Once logged in, run the code above
login: vagrant
password: vagrant
DONE
In the next part of this series, we will walk through Part 2 of our local development environment setup where we install the LAMP stack.
REFERENCES
https://git-scm.com/
https://winscp.net/eng/index.php
http://www.chiark.greenend.org.uk/~sgtatham/putty/download.html
https://www.vagrantup.com/docs/getting-started/synced_folders.html
https://www.vagrantup.com/docs/installation/
https://www.vagrantup.com/docs/why-vagrant/
https://www.vagrantup.com/downloads.html
https://www.virtualbox.org/

All Comments:
Ken, can you provide a working way to use ubuntu 16.04 or 16.10 with vagrant?
There were problems with vagrant ubuntu 16.04 boxes in the past but it installs well now. In section 2.2 above, just replace with the line below to use the bento box. This is for ubuntu 16.04 (LTS):
$ vagrant init bento/ubuntu-16.04